


How to use Whisper in Python
Whisper is an AI model from OpenAI that allows you to convert any audio to text with high quality and accuracy. In this article I will show you how to use this AI model to get transcriptions from an audio file and how to run it with Python.
1. Creating your environment
At this point, I recommend that you use Conda to build the environment for Python and handle dependencies with poetry.
mkdir whisper_project
cd whisper_project
conda create --name whisper_project python=3.10
conda activate whisper_project
conda install -c conda-forge ffmpeg
conda install -c conda-forge poetry
poetry init
Note that I installed ffmpeg to handle audio files in the environment, this is necessary to use Whisper with Python.
2. Installing Whisper
When you have your environment ready, you can install Whisper using the following command:
poetry add openai-whisper
3. Using Whisper
Now that you have Whisper installed, you can create a main.py file and import Whisper as a Python package, then load the model you want to use. There are five models sizes offering speed and accuracy tradeoff.
| Size | English-only model | Multilingual model | Required VRAM | Relative speed |
|---|---|---|---|---|
| tiny | tiny.en | tiny | ~1 GB | ~32x |
| base | base.en | base | ~1 GB | ~16x |
| small | small.en | small | ~2 GB | ~6x |
| medium | medium.en | medium | ~5 GB | ~2x |
| large | N/A | large | ~10 GB | 1x |
Here is the code in main.py to use Whisper with Python:
# main.py
import whisper
model = whisper.load_model('large')

def get_transcribe(audio: str, language: str = 'en'):
    return model.transcribe(audio=audio, language=language, verbose=True)

if __name__ == "__main__":
    result = get_transcribe(audio='./input/audio.wav')
    print('-'*50)
    print(result.get('text', ''))
With the get_transcribe function you can get the transcription of an audio file, this function has 2 arguments the audio path and the language. The audio is the path to the audio file in your environment, finally language is the idiom of the audio file, it is possible that Whisper could recognize the audio idiom but, for this it works better if you define it from the start. In this case I will use the following audio file and get the transcription.
4. Running the script
Now in you terminal with the following command, you can run the script:
python main.py
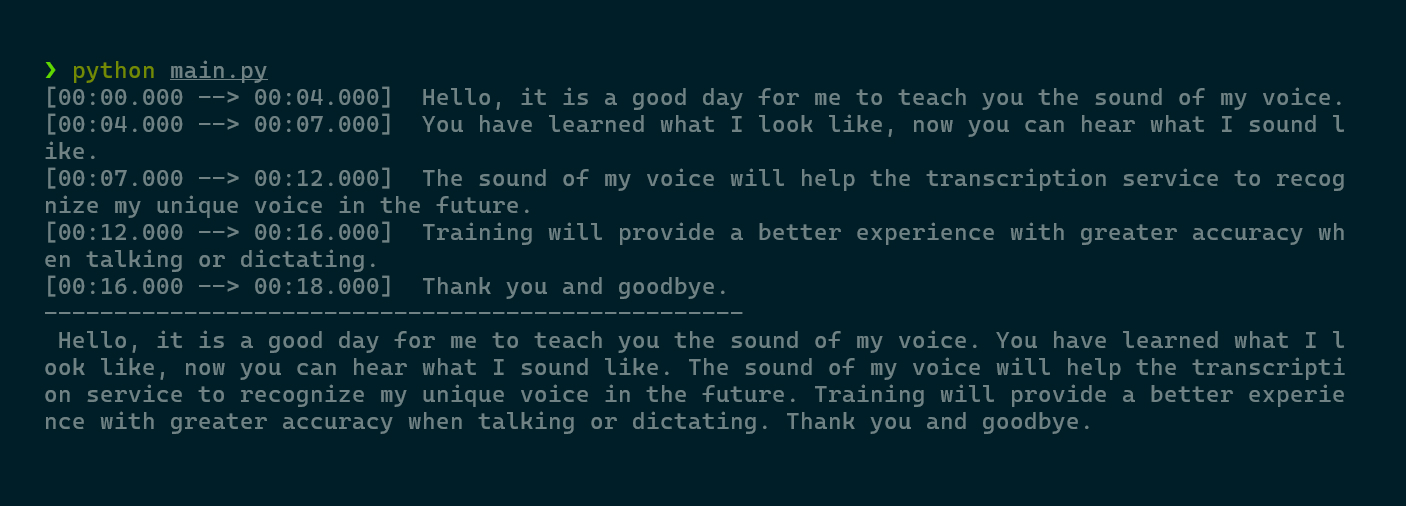
🎉🎉🎉
Now I can create a Jupyter notebook, in this case the file is called demo.ipyhnb and use Whisper in the notebook.
5. Save results in files
Whisper has a set of utilities that allow you to save the results in different formats to handle transcription results. You can use the get_writer function to get a writer and save the results to a file with a specified format.
from whisper.utils import get_writer

writer = get_writer("tsv", './')
writer(results, 'transcribe.tsv')
Implementing this in the main.py file, you can save the results in a file with the following code:
# main.py
import whisper
from whisper.utils import get_writer
model = whisper.load_model('large')


def get_transcribe(audio: str, language: str = 'en'):
    return model.transcribe(audio=audio, language=language, verbose=True)


def save_file(results, format='tsv'):
    writer = get_writer(format, './output/')
    writer(results, f'transcribe.{format}')


if __name__ == "__main__":
    result = get_transcribe(audio='./input/audio.wav')
    print('-'*50)
    print(result.get('text', ''))
    save_file(result)
    save_file(result, 'txt')
    save_file(result, 'srt')
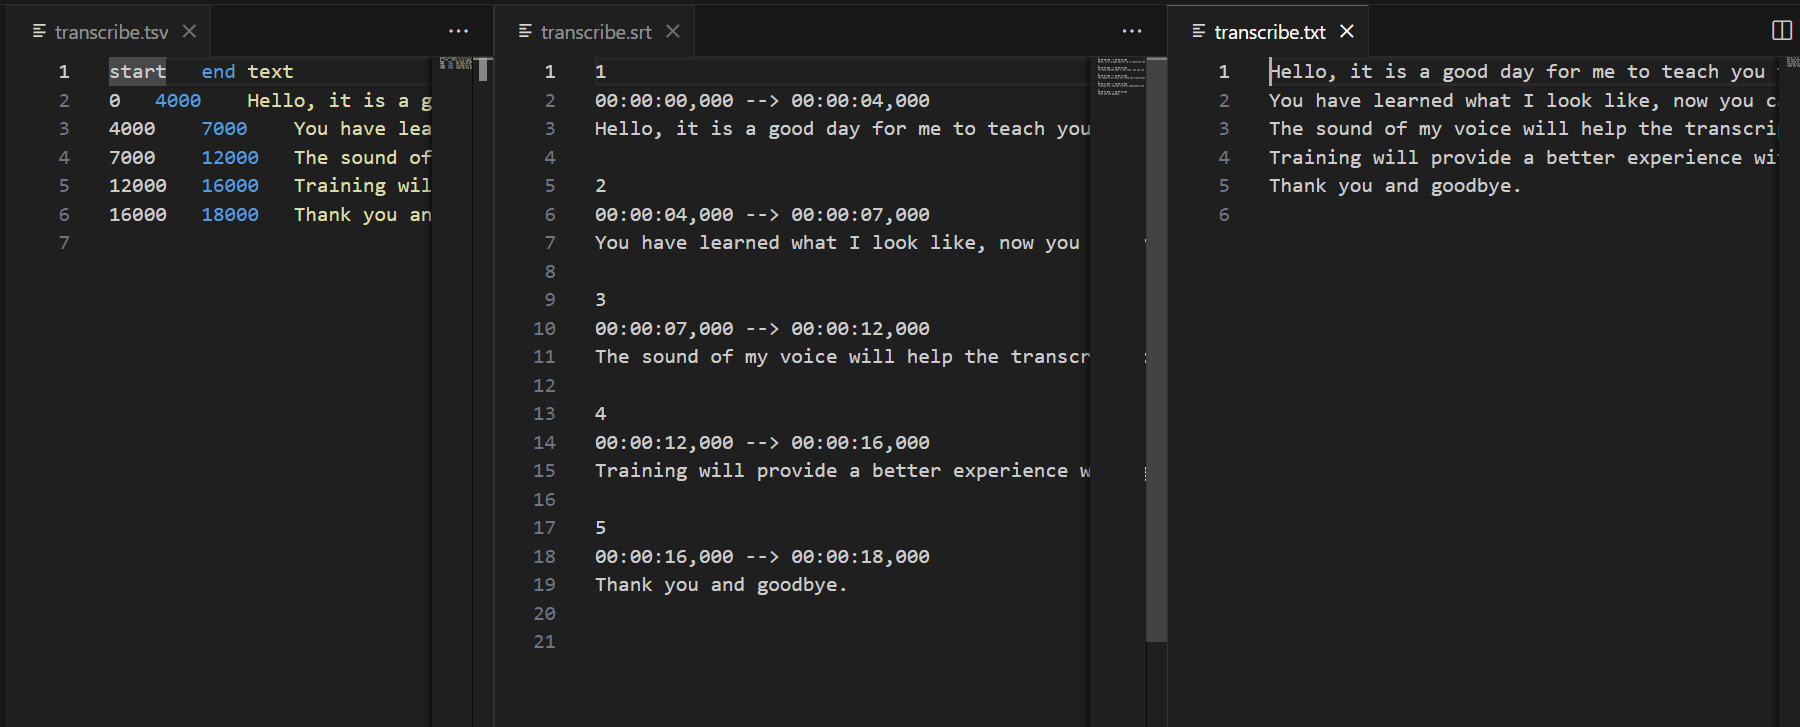
As a result now you have the transcription in a tsv, txt and srt formats.
And the project structure will look like this:
.
├── input
│   └── audio.wav
├── main.py
├── output
│   ├── transcribe.srt
│   ├── transcribe.tsv
│   └── transcribe.txt
├── poetry.lock
└── pyproject.toml